
Sometimes you look around your home and feel that itch for change, but the thought of dust, tools, and weeks of disruption makes you close your eyes and wish the feeling away. That is exactly where self adhesive wall trim comes to the rescue. This clever product gives you all the visual impact of traditional decorative trim without any of the baggage. No nail guns, no drying time for glue, no patching holes when you change your mind. You simply measure, peel, stick, and move on with your day. For anyone craving a quick home renovation that actually fits into a busy schedule, self adhesive trim turns what used to be a major project into something closer to hanging a picture frame. That speed does not sacrifice beauty either. Modern versions come in elegant profiles that fool even seasoned designers.
How Self Adhesive Trim Actually Works
Let me pull back the curtain on the technology here, because it is more sophisticated than you might expect. Self adhesive wall trim wall trim starts as a lightweight molding made from flexible polyurethane, soft PVC, or high-density foam. The back of each piece features a channel filled with industrial-grade double-sided tape, usually covered by a protective paper strip. When you peel that paper away, you expose an adhesive engineered to bond strongly with painted drywall, smooth plaster, glass, or even tile. Unlike craft store tape that dries out after a year, these adhesives use acrylic or rubber-based formulas that maintain their grip through humidity, temperature changes, and the normal settling of your home. Some premium brands claim their tape actually grows stronger over the first seventy-two hours as it cures. Remove the trim later with gentle heat from a hairdryer, and the adhesive releases cleanly without peeling your paint.
Why Self Adhesive Trim Transforms Renovation Timelines
A traditional molding project eats up at least a full weekend, often spilling into the following week if you account for adhesive drying and paint curing. Self adhesive trim collapses that timeline into a single afternoon. You can start after breakfast and sit down to admire your finished wall before dinner. That speed matters more than you might think because it removes the biggest barrier to home improvement: momentum. When a project takes days, you lose steam. Supplies get scattered. Life interrupts. But when you know you can finish in hours, you actually start. And finishing one quick renovation often sparks the confidence to tackle another. Suddenly that sad little hallway or that boring bathroom mirror wall does not seem like a distant dream. It seems like a Tuesday evening project.
Best Places to Install Self Adhesive Trim
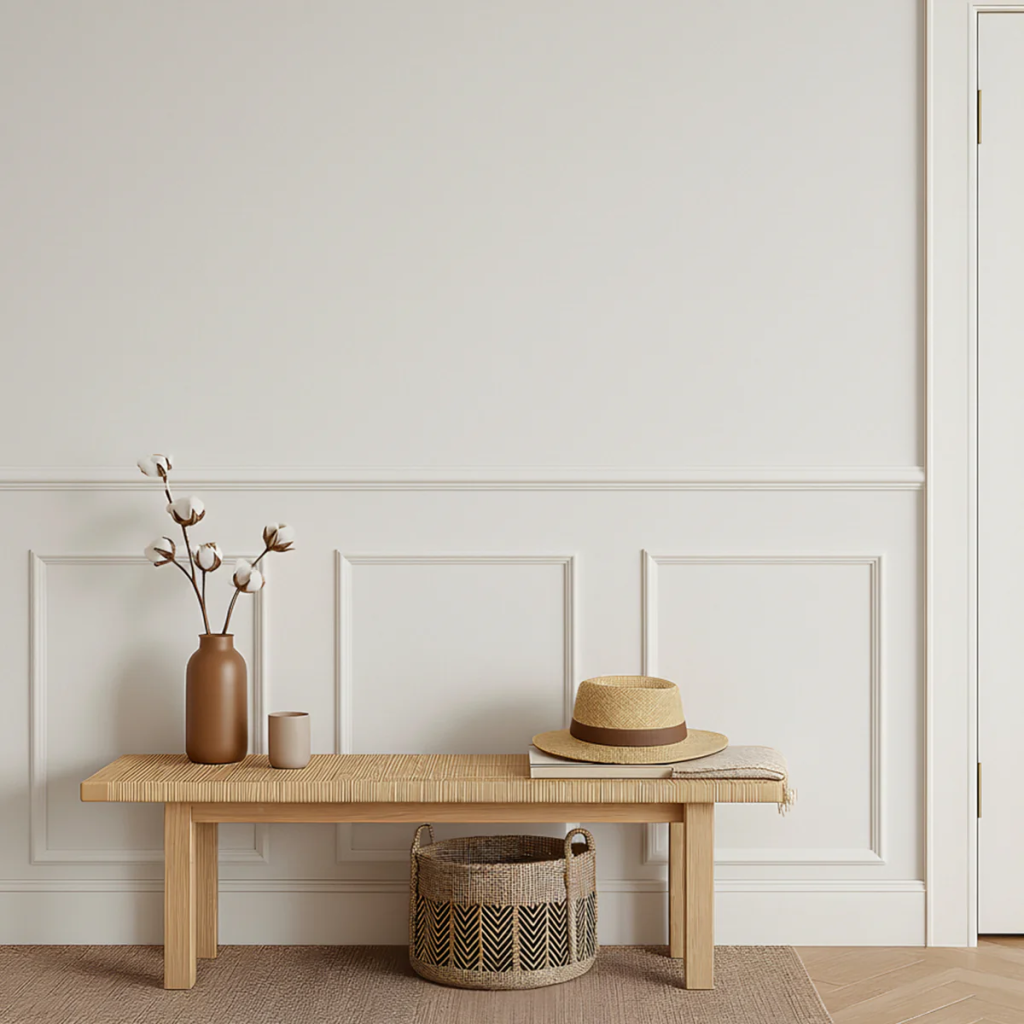
The beauty of self adhesive wall trim is how many surfaces welcome it. Bathrooms are prime candidates because foam and PVC molding resist moisture far better than MDF or raw wood, which can swell and warp. Install vertical strips behind your vanity mirror to frame it like a custom piece, or run horizontal bands across a blank shower wall for instant character. Kitchens benefit too. Apply trim around your range hood or use it to create a faux backsplash pattern behind open shelving. For renters, self adhesive trim is nothing short of a miracle. Landlords rarely object to removable decorative elements, and you can take your beautiful trim with you when you move. Bedrooms, home offices, laundry rooms, and even closet interiors all offer blank canvases waiting for the quick transformation that self adhesive trim provides.
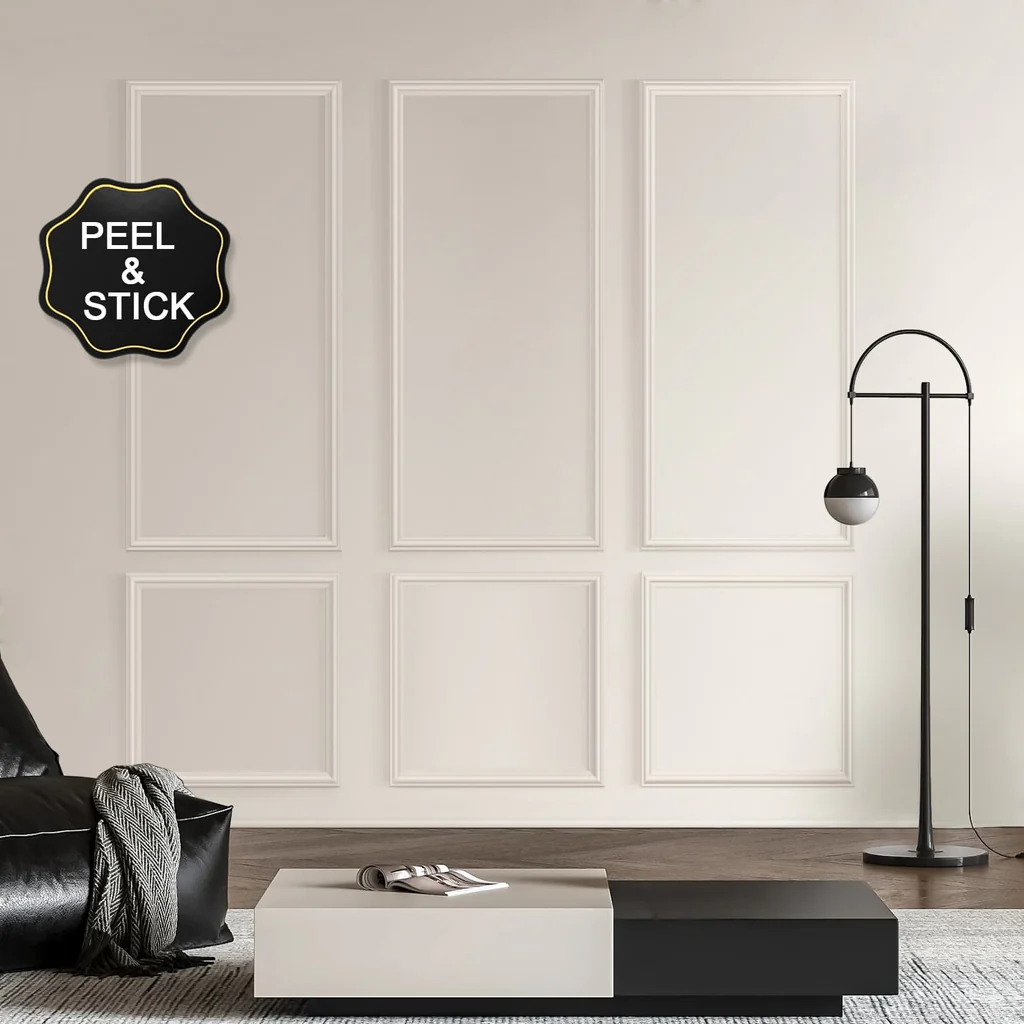
Designing Patterns Without Permanent Commitment
One of the most liberating aspects of self adhesive trim is how freely you can experiment. Because the pieces stick firmly yet remove cleanly, you can try a layout, live with it for a week, and then reposition everything if the mood strikes. Want to see how a grid of six rectangles looks above your sofa? Go ahead. Thinking a single oversized arch might frame your bed better? Test it with a single piece of trim first. This trial-and-error freedom changes the entire design process. You are no longer locked into a decision the moment you apply adhesive. Some people keep a roll of painter’s tape handy and mock up their entire design before peeling any backing paper. Others simply stick the trim in place gently, press only the center, and step back to evaluate. The flexibility encourages creativity that traditional glue-down or nail-up trim simply cannot match.
Step by Step Installation Anyone Can Master
Let me walk you through a typical installation so you see just how approachable this is. First, clean your wall thoroughly with rubbing alcohol and let it dry completely. Any dust, grease, or soap residue will weaken the adhesive bond. Next, sketch your design lightly in pencil using a level to keep lines straight. Then peel about two inches of the backing paper off one trim piece and press that starting point against your pencil mark. Slowly peel the remaining paper while pressing the trim into place, smoothing as you go with a small roller or even a clean dry cloth. For corners, cut the trim at a forty-five degree angle using scissors or a utility knife, since most self adhesive trim cuts easily by hand. Overlap or miter the corners depending on your preference. Work piece by piece until your pattern is complete. Finally, go over every inch of trim with your roller to ensure full adhesive contact.
Making Your Self Adhesive Trim Look Expensive
Here is a secret that separates basic installations from stunning ones: paint. Self adhesive trim usually comes in white or off-white, which can look a bit plasticky straight out of the package. But once you paint it, the material transforms completely. Use a high-quality latex primer first, then apply two thin coats of your chosen color. For a seamless built-in look, paint the trim the exact same shade as your wall. For drama, choose a contrasting color like black, navy, or deep green. The paint also serves a practical purpose. It seals the edges of the trim where the adhesive meets the wall, creating an extra barrier against dust and moisture. Just avoid heavy gloss paints that might become brittle over time. A satin or eggshell finish gives you durability without cracking. Stand back after the paint dries, and you will genuinely forget your beautiful new trim started as a simple peel and stick product.