
If you have ever stared at a large, blank wall and wished it had just a little more character, you are not alone. Flat, featureless walls can make even the most beautifully furnished room feel incomplete. The good news is that you do not need to hire a carpenter or take on a messy renovation to add architectural interest. Enter the premium wall molding kit—a complete, do-it-yourself solution that brings instant elegance and texture to any space. These kits take the guesswork out of measuring, cutting, and arranging decorative trim, allowing you to achieve a custom, high-end look over a single weekend. Whether you dream of classic wainscoting, modern geometric panels, or a traditional picture frame style, a quality molding kit offers the precision and style to transform your walls from forgettable to fabulous.
Why Choose a Molding Kit Over Traditional Trim Work
Walking into a home improvement store and buying individual lengths of polyurethane or wood molding can quickly become overwhelming. You have to calculate how many linear feet you need, figure out the best way to cut forty-five-degree angles, and hope your measurements are precise enough to avoid gaps. A premium wall molding kit eliminates all that hassle. Everything comes pre-measured and pre-cut for a specific design pattern, so you know each piece fits perfectly with the next. Moreover, these kits are typically made from lightweight, durable materials like high-density polyurethane, which resists moisture, cracking, and warping far better than natural wood. You also skip the sanding, staining, and sealing required for raw lumber. In short, a kit offers professional-looking results with a fraction of the effort, cost, and skill traditionally required.
What’s Inside a Typical Premium Wall Molding Kit
When you open a high-quality molding kit, you will find more than just sticks of trim. Most kits include all the pre-cut molding pieces for a specific panel layout, along with a detailed template or positioning guide. You also get a tube of high-strength construction adhesive designed specifically for trim work, which means you can skip the nail gun entirely. Many premium kits even include corner blocks or rosettes to create seamless joints without miter cuts. Additionally, the manufacturer usually provides a set of sanding sponges, paintable caulk, and step-by-step video instructions. Some advanced kits also offer alignment spacers to ensure equal gaps between panels. With everything in one box, there is no last-minute run to the hardware store. You simply open, lay out your pieces, and start transforming your wall.
Step-by-Step Installation: Easier Than You Think
The installation process is surprisingly straightforward, even for someone who has never handled a level or a caulk gun. First, you prepare your wall by cleaning it and marking a level horizontal line where your molding will sit. Next, you lay out the molding pieces on the floor according to the kit’s template, just to make sure you understand the pattern. Then, working one panel at a time, you apply the construction adhesive to the back of each piece and press it firmly onto the wall. Using a level, you adjust each piece until it is perfectly straight. After the adhesive sets—usually in about an hour—you fill the tiny seams between joints with paintable caulk and smooth them with a damp finger. Finally, you prime and paint the molding the same color as your wall for a seamless, built-in look, or choose a contrasting shade for dramatic emphasis. The entire process for an average-sized room typically takes six to eight hours spread over two days.

Creative Design Ideas for Every Room in Your Home
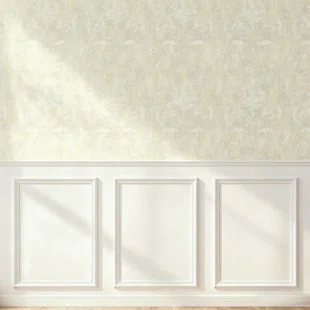
One of the best features of a premium molding kit is its versatility. In a formal living room, floor-to-ceiling panel molding creates a stately, traditional atmosphere that pairs beautifully with chandeliers and velvet furniture. For a dining room, consider a wainscoting-style kit that covers only the lower third of the wall, topped with a chair rail; it adds elegance while protecting the wall from chair backs. In a bedroom, a simple grid of square or rectangular panels behind the headboard acts as a stunning, budget-friendly alternative to an upholstered accent wall. Even a small powder room can benefit from a single row of narrow picture-frame molding to give the illusion of height. For modern or farmhouse interiors, look for kits with clean, unornamented profiles and wide spacing between panels. The possibilities are nearly endless, and because the kits are removable with some effort, you can always change the look when you redecorate.
Long-Term Value and Maintenance Tips
Investing in a premium wall molding kit adds more than just beauty; it also increases the perceived value of your home. Real estate professionals often note that architectural details like panel molding make a house feel more custom and well-cared-for, which can be a deciding factor for potential buyers. Maintenance is remarkably simple. Because the polyurethane material resists dents and moisture, a quick dusting or a wipe with a damp cloth is all it takes to keep the molding looking fresh. If you ever need to touch up the paint, a small artist’s brush works perfectly for edges and corners. Avoid using abrasive cleaners or scouring pads, as they can scratch the painted finish. Also, keep an eye on the caulked seams after a few years; if any tiny cracks appear, a fresh bead of caulk will seal them right up. With just a little care, your premium molding will stay crisp and beautiful for decades, continuing to turn blank walls into conversation pieces.