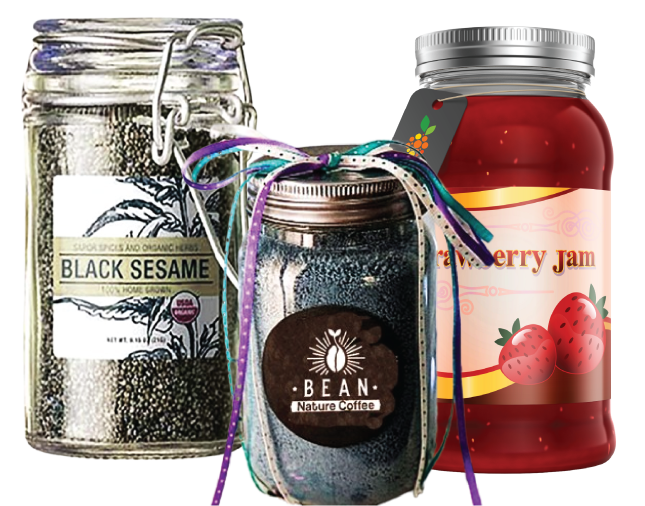
Mason Jars Labels are a practical and aesthetically pleasing way to keep your kitchen organized, showcase homemade gifts, and ensure that pantry items are easily identifiable. First, mason jar labels serve multiple purposes: they help you keep track of contents, ensure freshness, and add a touch of personalization. Additionally, whether you’re using them for canning, storing dry goods, or gifting, proper labeling can significantly enhance both functionality and presentation. Here’s a detailed guide to help you label your mason jars effectively and stylishly.
Step 1: Choose Your Labels
Before you begin labeling, it’s essential to select the appropriate type of mason jar labels. First, think about the jars’ intended use. For instance, if you are canning fruits or vegetables, waterproof and durable labels are necessary to withstand moisture and temperature changes. Alternatively, if the jars are for decorative purposes or organizing dry goods, paper labels might be sufficient.
Additionally, consider the size and shape of the labels. Most importantly, they should fit the jar’s surface without overlapping or peeling off easily. You can choose from pre-printed labels, customizable blank labels, or even design your own using printable label sheets. Moreover, ensure that the label material complements the jar’s appearance and intended use.
Step 2: Design Your Labels
Once you have selected your labels, it’s time to design them. First, decide what information you want to include. Typically, this includes the contents of the jar, the date of preparation, and any additional details such as ingredients or usage instructions. For example, if you’re labeling homemade jams, you might include the flavor and a “best by” date.
Next, use design software or online tools to create your labels. Programs like Canva, Microsoft Word, or Adobe Illustrator offer various templates and design elements to help you create a professional-looking label. Make sure to choose a font that is easy to read and colors that stand out against the jar’s surface.
Step 3: Print or Write the Labels
Once your label design is finalized, it’s time to print or write them. For printed labels, use high-quality label paper suited for your printer type, whether inkjet or laser. Be sure to adjust your printer settings to match the label paper to achieve the best results. If needed, do a test print on plain paper to check alignment and quality before printing the final labels.
If you are handwriting the labels, use a permanent marker or pen that resists smudging. Furthermore, write neatly and legibly to ensure that the information is easy to read. Consider using a ruler to keep your writing straight and uniform. If your labels are blank, you might also use pre-made templates to guide your writing.
After printing or writing, let the labels dry completely to avoid any smudging or blurring. If you’re printing a large batch, it may be helpful to let them dry in a well-ventilated area.
Step 4: Apply the Labels
Now that your labels are ready, it’s time to apply them to the mason jars. First, ensure that the surface of the jars is clean and dry. Wipe the jars with a damp cloth if necessary, and allow them to dry completely before applying the labels. This step is crucial to ensure that the labels adhere properly and do not peel off.
Then, carefully peel off the backing from the label and apply it to the jar. Be sure to position it correctly and smooth it out to avoid air bubbles. If necessary, use a small squeegee or a credit card to press down the label and remove any bubbles. After applying, press firmly around the edges to ensure the label sticks well.
Additionally, if you’re using transparent or semi-transparent labels, make sure that the jar contents are visible through the label. This will help maintain both functionality and aesthetic appeal.
Step 5: Customize for Special Occasions
Furthermore, if you’re labeling jars for special occasions like weddings, holidays, or parties, adding extra decorative touches can enhance their appeal. For example, consider using themed ribbons, decorative tags, or additional stickers that match the event’s theme. Incorporate colors and designs that complement the overall theme for a cohesive look.
If you’re giving the jars as gifts, including a personal note or message on the label can add a thoughtful touch. Additionally, using high-quality materials for these labels will ensure that they look professional and well-crafted.
Step 6: Maintain and Update Labels
Finally, labeling is not a one-time task. As you use or refill the jars, update the labels as needed. For example, if you change the contents or the date, you may need to replace the label to reflect the new information. Additionally, periodically check the labels for any signs of wear or damage.
Replace any labels that are peeling or fading to ensure that the information remains clear. If you store jars long-term, consider using labels that can be easily removed or replaced without leaving residue. This will facilitate updates and maintain a clean appearance.
Furthermore, if you’re using jars for various purposes, you might find it helpful to have a system for labeling and updating. For example, creating a template or a labeling guide can streamline the process and ensure consistency.
Conclusion:
Labeling mason jars effectively is a simple yet impactful way to organize and personalize your jars. By following these steps, you can ensure that your labels are functional, aesthetically pleasing, and tailored to your needs. Furthermore, whether you’re preparing jars for home use, gifts, or business purposes, proper labeling adds value and enhances presentation.
In conclusion, mason jar labels can significantly improve the organization and appeal of your jars. Moreover, using the right labeling techniques ensures that your jars remain useful and attractive over time. For extensive labeling projects or larger quantities, exploring professional services offered by Packaging Printing companies can provide high-quality and consistent results.


