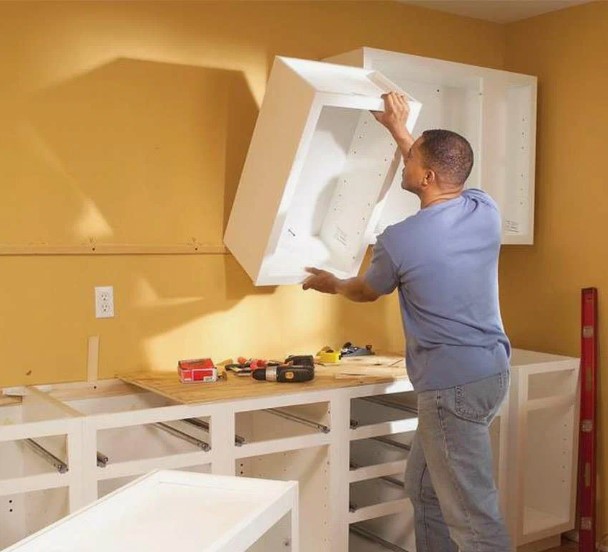
A new kitchen installation can transform your home, adding style, functionality, and value. However, the process can be stressful if you’re not prepared. Getting your home ready beforehand ensures everything goes smoothly. Let’s dive into some simple and actionable steps to prepare your home for a hassle-free kitchen installation.
Understanding the Kitchen Installation Process
What Is Kitchen Installation?
Kitchen installation involves fitting cabinets, countertops, appliances, and other features into your kitchen space. It’s not just about placing items; it’s a detailed process that includes plumbing, electrical work, and sometimes structural changes. Most projects take anywhere from a few days to several weeks, depending on the complexity.
Benefits of Proper Preparation
Preparing your home saves time and reduces stress. Here are some key benefits:
- Fewer Delays: Avoiding last-minute surprises keeps the project on track.
- Cost Control: Proper preparation helps prevent unexpected expenses.
- Safety: Minimizes risks for installers and your family.
Steps to Prepare Your Home for Kitchen Installation
Planning and Prepping the Space
Measuring and Layout Confirmation
Before installation begins, double-check all measurements. Confirm your kitchen layout with the contractor or designer to ensure accuracy. A mistake here can lead to significant delays.
Clearing the Work Area
Remove furniture, appliances, and any personal items from the kitchen. A clear space allows installers to work efficiently and reduces the risk of damage.
Disconnecting Utilities
Turn off the water, gas, and electricity connected to your kitchen. If you’re unsure how to do this safely, hire a professional. Properly disconnecting utilities is crucial to avoid accidents.
Protecting Your Home During Installation
Dust and Debris Control
Kitchen installations can create a lot of dust. Use plastic sheets to seal off doorways and protect nearby rooms. Investing in an air purifier can help keep the air clean.
Floor and Wall Protection
Cover floors with protective materials like cardboard or drop cloths to prevent scratches. Use painter’s tape and plastic sheets to shield walls from accidental damage.
Temporary Kitchen Setup
Creating a Functional Temporary Kitchen
Since your kitchen will be out of commission, set up a temporary cooking area. Use portable appliances like a microwave, toaster oven, or electric kettle. Place this setup in a dining room, living room, or any convenient spot.
Storing Food and Essentials
Stock up on easy-to-prepare meals and store non-perishable foods in inaccessible areas. Keep frequently used utensils, plates, and cups handy to avoid searching for them during the installation.
Collaborating with Your Kitchen Installation Team
Communication Tips
- Schedule a pre-installation meeting to discuss timelines and expectations.
- Provide your contractor with easy access to the work area.
- Stay reachable to answer questions or make decisions promptly.
Sharing Your Vision
- Share your design preferences and material choices.
- If possible, provide samples or reference images to ensure alignment on the final look.
Preparing for Potential Challenges
Budgeting for Contingencies
Always set aside extra funds for unexpected expenses. Whether it’s additional materials or unforeseen repairs, having a buffer helps keep things stress-free.
Managing Timeline Delays
Kitchen installations don’t always go as planned. Weather, supply issues, or unexpected structural problems can cause delays. Stay flexible and work with your contractor to adjust the timeline if needed.
Post-Installation Cleanup and Setup
Cleaning and Organizing the New Kitchen
Once the installation is complete, clean the entire space. Wipe down cabinets, countertops, and appliances to remove dust. Organize your items thoughtfully to make your kitchen both functional and beautiful.
Final Walkthrough with Installers
Before signing off, do a detailed walkthrough with your installation team. Check if everything is installed correctly and discuss any final adjustments or fixes.
Conclusion
Preparing your home for a new kitchen installation doesn’t have to be overwhelming. With careful planning, communication, and a bit of flexibility, you can make the process smooth and stress-free. Start your preparation today and look forward to enjoying your brand-new kitchen! Whether you live in Kitchens Barnsley or elsewhere, preparation is key to a successful project. For professional help, consider reaching out to Formosa Bathrooms & Kitchen for expert advice and services.
FAQs
How long does a kitchen installation take?
It typically takes between one to three weeks, depending on the project’s complexity.
Can I stay at home during a kitchen installation?
Yes, but setting up a temporary kitchen can make the process more comfortable.
What should I do with my old kitchen appliances?
Consider donating, recycling, or storing them until the new kitchen is ready.
Why is measuring so important before installation?
Accurate measurements ensure everything fits perfectly, preventing delays or extra costs.
How can Formosa Bathrooms & Kitchen help with kitchen installations?
They offer expert services, guidance, and high-quality solutions tailored to your needs, especially for Kitchens Barnsley and nearby areas. Contact them today for more information.


